PHP Email API - Documentation
Create and manage email addresses in PHP. Send and receive emails and attachments in code and tests.
Quick links
Examples
Get started
MailSlurp is an email API that lets you create email addresses on demand then send and receive emails in code and tests. No MailServer is required.
This section describes how to get up and running with the PHP client. To use another language or the REST API see the developer page.
See the examples page for code examples and use with common frameworks.
See the method documentation for a list of all functions.
Get an API Key
You need a free MailSlurp account to use the service. Sign up for a free account first.
Once signed up login your dashboard. Find your API Key and copy the code. You'll need this to configure the MailSlurp client in PHP.
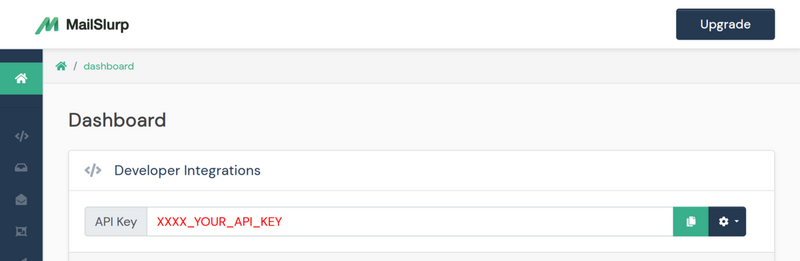
Copy your API Key from the MailSlurp dashboard.
PHP Setup
The client is tested for PHP 7 and requires the following non-default PHP extensions to be installed:
Typically these come with most PHP installations. They can also be installed like so:
sudo apt-get install php-ext-curl php-mbstring php-xml
Add PHP Library
There are several ways to install MailSlurp.
a) Composer dependency
If you use the composer package manager you can run
Or add it to your composer.json file:
{
  "repositories": [
    {
      "type": "vcs",
      "url": "https://github.com/mailslurp/mailslurp-client-php.git"
    }
  ],
  "require": {
    "mailslurp/mailslurp-client-php": "*@dev"
  }
}
Then include the library with the composer autoload convention:
<?php
// assuming your file is in root directory and a vendor folder exists next to it
require_once(__DIR__ . '/vendor/autoload.php');
b) Manual installation
Alternatively you can download the PHP Library and include it in your project's root directory.
Then include the files to have access to MailSlurp in your code:
Create an API instance
To call the MailSlurp API you must create an instance of the controller you wish to access. Each instance must be configured with an API Key. See method documentation for a list of all controllers and methods.
<?php
// add your API Key to the MailSlurp config
$config = MailSlurp\Configuration::getDefaultConfiguration()->setApiKey('x-api-key', 'YOUR_API_KEY');

// create controllers to access parts of the MailSlurp API
$inboxController = new MailSlurp\Apis\InboxControllerApi(null, $config);
$waitForController = new MailSlurp\Apis\WaitForControllerApi(null, $config);
A common test pattern might look like this:
<?php
require_once(__DIR__ . '/vendor/autoload.php');

use PHPUnit\Framework\TestCase;

/**
 * Example tests for MailSlurp
 */
class MailSlurp_SDK_Test extends TestCase
{

    public $config;

    /**
     * Setup mailslurp config for later use
     */
    public function setUp(): void
    {
        // get api key from environment variables (use your own key here)
        $API_KEY = getenv('API_KEY');
        $this->assertNotEmpty($API_KEY, "API Key must not be empty");

        // create configuration with api key
        $this->config = MailSlurp\Configuration::getDefaultConfiguration()->setApiKey('x-api-key', $API_KEY);
    }
}
Basic usage
A common use case is to create a new email address, send it an email and then receive the contents:
Create an email address
To create an email address use the inbox controller to create a new inbox. Inboxes have real email addresses and can send and receive emails and attachments.
<?php
public function test_canCreateInboxes(): void
{
    // create an inbox controller with config
    $inboxController = new MailSlurp\Apis\InboxControllerApi(null, $this->config);

    // create inbox
    $inbox = $inboxController->createInbox();

    // assert on properties
    $this->assertNotNull($inbox->getId());
    $this->assertStringContainsString("@mailslurp.com", $inbox->getEmailAddress());
}
Inbox types
Inboxes can be either SMTP or HTTP type. Set the inbox type using the inboxType property. SMTP inboxes are handled by a custom mailserver and support a wide range of clients while HTTP inboxes use Amazon SES and don't support some older clients like Outlook. SMTP inboxes are recommended for public facing email addresses while HTTP inboxes are best for application testing. Please see the guide on types of inboxes for more information.
SMTP access (PHPMailer, mail function etc.)
SMTP inboxes provide IMAP and SMTP access credentials via the getImapSmtpAccess function.
<?php
$inboxController = new MailSlurp\Apis\InboxControllerApi(null, $this->config);
$inbox1 = $inboxController->createInboxWithOptions(new \MailSlurp\Models\CreateInboxDto([ "inbox_type" => "SMTP_INBOX"]));
$this->assertStringContainsString("@mailslurp.mx", $inbox1->getEmailAddress());

$inbox2 = $inboxController->createInbox();
$smtpAccess = $inboxController->getImapSmtpAccess($inbox1->getId());
Use the host, port, username and password returned to configure PHPMailer, PearMailer or other SMTP sending clients.
<?php
use PHPMailer\PHPMailer\SMTP;
use PHPUnit\Framework\TestCase;
use PHPMailer\PHPMailer\PHPMailer;
use PHPMailer\PHPMailer\Exception;

$mail = new PHPMailer(true);
try {
    // User smtp access to configure PhpMailer for MailSlurp
    $mail->SMTPDebug = SMTP::DEBUG_SERVER;
    $mail->isSMTP();
    $mail->SMTPAuth   = true;
    $mail->Host       = $smtpAccess->getSmtpServerHost();
    $mail->Username   = $smtpAccess->getSmtpUsername();
    $mail->Password   = $smtpAccess->getSmtpPassword();
    $mail->SMTPSecure = '';
    $mail->Port       = $smtpAccess->getSmtpServerPort();

    // test connection (secure disabled)
    $connected = $mail->smtpConnect();
    $this->assertTrue($connected);

    // write email from inbox1 to inbox2
    $mail->setFrom($inbox1->getEmailAddress());
    $mail->addAddress($inbox2->getEmailAddress());
    $mail->isHTML(true);
    $mail->Subject = 'Hello inbox2';
    $mail->Body    = 'This is an <b>HTML</b> message';

    // send the email
    $sent = $mail->send();

    $this->assertTrue($sent);
} catch (Exception $e) {
    echo "Message could not be sent. Mailer Error: {$mail->ErrorInfo}";
    throw new Exception($mail->ErrorInfo);
}
List inboxes
Inbox lists are paginated.
<?php
public function test_canListInboxes(): void
{
    // create an inbox controller with config
    $inboxController = new MailSlurp\Apis\InboxControllerApi(null, $this->config);

    $pageInboxes = $inboxController->getAllInboxes($favourite = null, $page = 0, $size = 20);

    // assert pagination properties
    $this->assertEquals(0, $pageInboxes->getNumber());
    $this->assertEquals(20, $pageInboxes->getSize());
    $this->assertGreaterThan(0, $pageInboxes->getTotalElements());

    // access inboxes via content
    foreach ($pageInboxes->getContent() as $inbox) {
        $this->assertNotNull($inbox->getId());
    }
}
Send an email
To send an email first create an inbox. Then use the sendEmail method on the InboxController and pass it the sender inbox's ID and email options.
<?php
public function test_canSendEmail(): void
{
    // create a new inbox
    $inboxController = new MailSlurp\Apis\InboxControllerApi(null, $this->config);
    $inbox = $inboxController->createInbox();

    // send options
    $sendOptions = new MailSlurp\Models\SendEmailOptions();
    $sendOptions->setTo([$inbox->getEmailAddress()]);
    $sendOptions->setSubject("Welcome");
    $sendOptions->setIsHtml(true);
    // (you can use normal strings too)
    $sendOptions->setBody(<<<EOF
        <html>
            <h1>MailSlurp supports HTML</h1>
        </html>
    EOF);

    // send
    $inboxController->sendEmail($inbox->getId(), $sendOptions);
}
Attachments
Using attachments in PHP is easy. For sending attachments you must first upload each file and store the returned attachment IDs. For sending use these IDs with SendEmailOptions. Received email attachments can be downloaded using the EmailControllerApi.
<?php
private function uploadAttachment(): array
{
    // a path to some file you want to attach
    $pathToAttachment = $this->pathToAttachment;

    // read file contents
    $contents = file_get_contents($pathToAttachment);

    // encode the file contents to a base64 encoded string for uploading
    $base64Contents = base64_encode($contents);

    // extract file name from path
    $filename = basename($pathToAttachment);

    // get the mime type from the file name
    $contentType =  mime_content_type($filename);

    // set upload options
    $uploadOptions = new MailSlurp\Models\UploadAttachmentOptions();
    $uploadOptions->setFilename($filename);
    $uploadOptions->setContentType($contentType);
    $uploadOptions->setBase64Contents($base64Contents);

    // now upload using attachment controller
    $attachmentController = new MailSlurp\Apis\AttachmentControllerApi(null, $this->config);

    // returns [$attachmentId]
    return $attachmentController->uploadAttachment($uploadOptions);
}
To send the attachments use like so:
<?php
$attachmentIds = $this->uploadAttachment();

// send options with attachments
$sendOptions = new MailSlurp\Models\SendEmailOptions();
$sendOptions->setTo([$inbox->getEmailAddress()]);
$sendOptions->setSubject("See attached!");
$sendOptions->setAttachments($attachmentIds);

$inboxController->sendEmail($inbox->getId(), $sendOptions);
Receive an email
You can receive emails in PHP using MailSlurp. First create an inbox then call a waitFor method. These methods wait until a new unread email has arrived and return it.
<?php
// get an email in the inbox
$timeout_millis = 10000; // wait at most 10 seconds for new email
$unread_only = true; // only count unread emails

$email = $waitForController->waitForLatestEmail($inbox->getId(), $timeout_millis, $unread_only);

// access email content and properties
print_r($email->getBody())
print_r($email->getSubject())
Larger example:
<?php
// create inbox to send from
$inboxController = new MailSlurp\Apis\InboxControllerApi(null, $this->config);

$inbox1= $inboxController->createInbox();
$inbox2 = $inboxController->createInbox();

// send options
$sendOptions = new MailSlurp\Models\SendEmailOptions();
$sendOptions->setTo([$inbox2->getEmailAddress()]);
$sendOptions->setSubject("Here are your files");
$sendOptions->setBody("Hello <strong>JOE</strong>");
$sendOptions->setIsHtml(true);

// send email from inbox 1 to inbox 2 using options above
$inboxController->sendEmail($inbox1->getId(), $sendOptions);

// wait for email to arrive in inbox 2
$waitForController = new MailSlurp\Apis\WaitForControllerApi(null, $this->config);
$email = $waitForController->waitForLatestEmail($inbox_id=$inbox2->getId(), $timeout=30000);

// access email contents
$this->assertEquals($email->getInboxId(), $inbox2->getId());
$this->assertStringContainsString("Here are your files", $email->getSubject());
Receive attachment
Test example:
<?php
$emailAttachmentId1 = $email->getAttachments()[0];

// download an attachment as base 64 encoded string
$emailController = new MailSlurp\Apis\EmailControllerApi(null, $this->config);
$downloadedAttachment = $emailController->downloadAttachmentBase64($emailAttachmentId1, $email->getId());

$this->assertGreaterThan(0, $downloadedAttachment->getSizeBytes());
$this->assertEquals("text/plain", $downloadedAttachment->getContentType());

// decode file contents
$content = base64_decode($downloadedAttachment->getBase64FileContents());
$this->assertStringContainsString("Sample upload file", $content);
Extract email content
You can use regex to parse codes or statements for email bodies like so:
<?php
// now we need to receive email
$waitForController = new MailSlurp\Apis\WaitForControllerApi(null, $config);
$email = $waitForController->waitForLatestEmail($inbox_id = $inbox->getId(), $timeout = 30000, $unread_only = true);

// extract the confirmation code
preg_match("/verification code is ([0-9]{6})/", $email->getBody(), $matches);
$code = $matches[1];
SDK Documentation
For more functions and examples read the library documentation or see the PHP guides.